Why I looked at it
The Maverick is a useful little truck and i have one, but I can't help but wonder if the handeling can't be improved. The question was simple: can I quickly measure the geometry well enough to see the major trends, identify the likely smoking guns, and decide if something could be done?
This is the kind of problem I like: physical hardware, imperfect data, a need for judgment, and a path to a useful answer without waiting for a perfect lab setup.
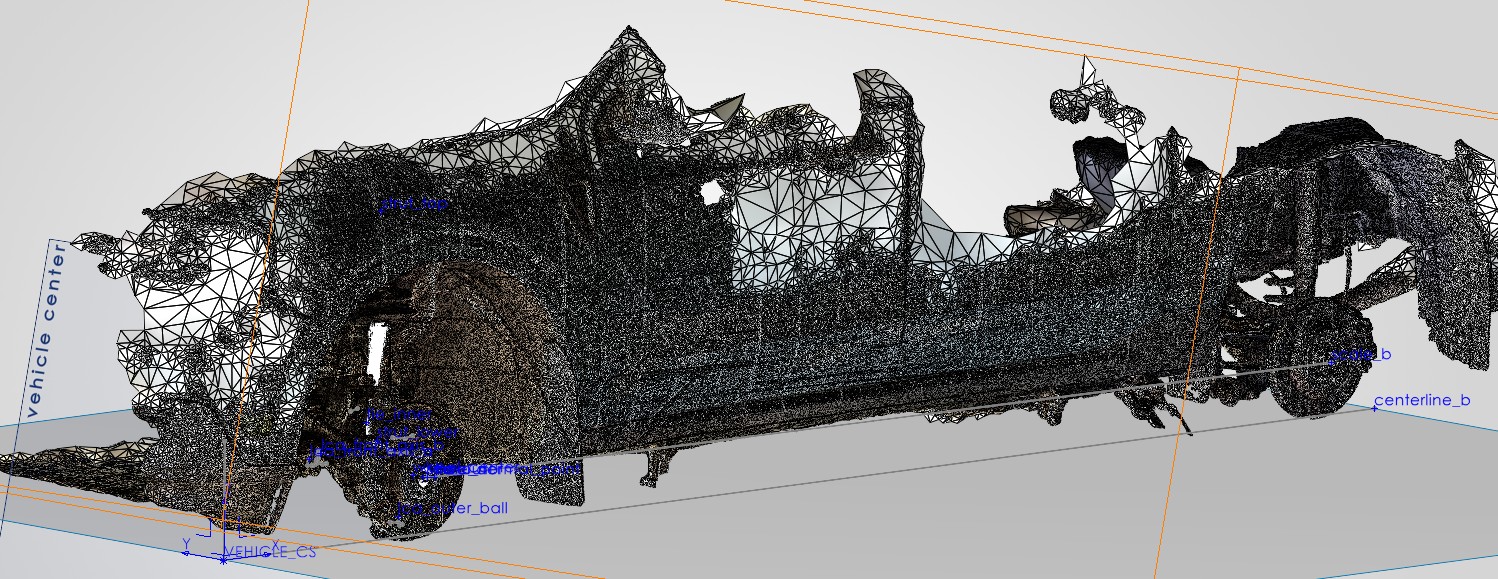
Photogrammetry mesh with key suspension points identified
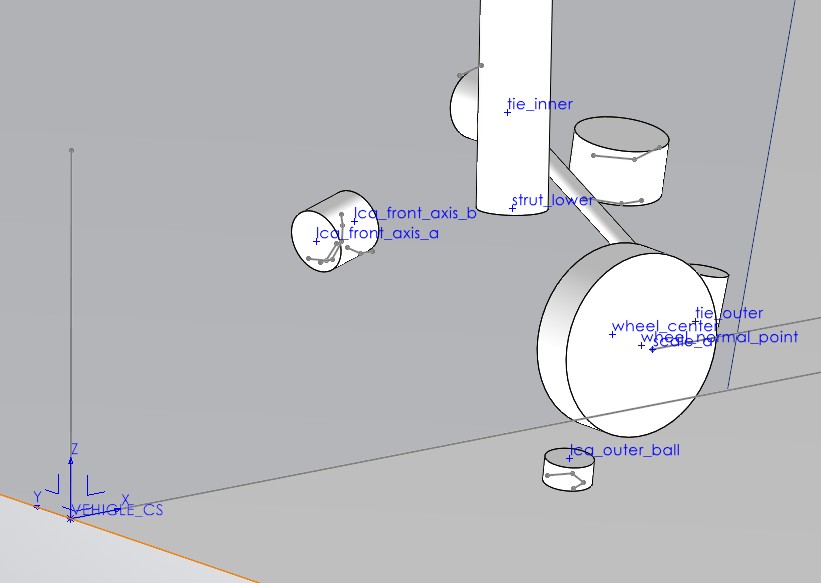
Cleaned point set used for kinematic reconstruction
Step 1: Capture the geometry
I used photogrammetry to create a spatial reference of the front suspension area, then in SolidWorks overlayed simple geometry to pull out the key hardpoints: lower control arm pivots, outer ball joint, strut top, strut lower mount, tie rod points, wheel center, and wheel normal. A macro then outputs the named points to a CSV file. The goal was not museum-grade reverse engineering. It was a clean enough geometry set to make the suspension tell on itself.
Step 2: Turn points into a model
Once the hardpoints were extracted, I used Codex as a coding partner to help build a Python tool for suspension kinematics reading my hardpoint CSV. The program takes the point set, moves the wheel through bump and droop, and calculates useful outputs like camber gain, toe change, roll center movement, track change, scrub-related trends, and the motion relationships between the strut, control arm, and steering link.
That is the value of the workflow: I can move from physical object → approximate digital geometry → analytical plots fast enough to learn while the problem is still fresh.
Kinematic Behavior
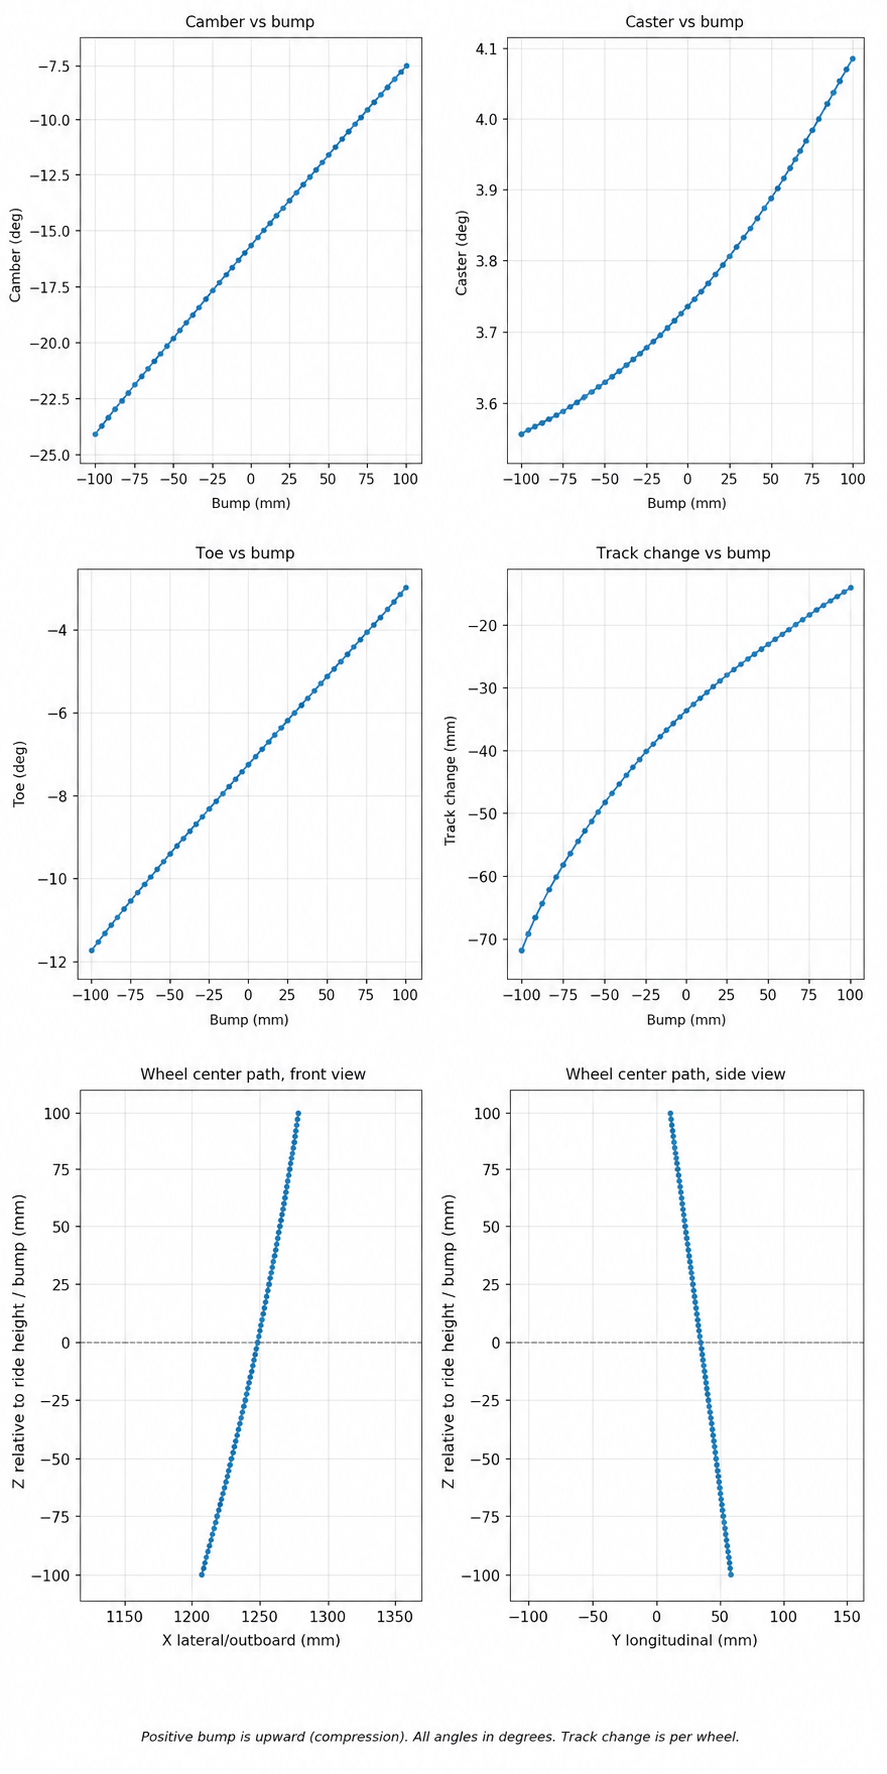
First-pass kinematic outputs from reconstructed geometry: camber, caster, toe, track change, and wheel center paths across ±100 mm travel
Step 3: Read the curves
The interesting part is not just generating curves. It is asking whether the curves make mechanical sense. Where does the camber go in bump? Is the toe curve calm or aggressive? Does the roll center wander in a way that would show up as vague behavior? Are the tie rod and control arm telling the same story, or fighting each other?
From there, the analysis becomes a design conversation. If the geometry has a problem, what kind of problem is it? A packaging compromise? A ride-height issue? A steering pickup issue? A strut-angle problem? Something that could be improved with alignment, or something baked into the hardpoints?
Reference comparison
To be absolutely crazy I want to compare the Maverick curves against a known performance reference, such as a Porsche 911 front suspension layout. Why not shoot for the moon right?!
Punchline
This exercise wasn’t about perfectly reconstructing the Maverick’s suspension — it was about building a fast, defensible understanding of how it behaves.
From a relatively lightweight workflow (photogrammetry → point extraction → simple kinematic model), a few clear trends emerge:
- Camber gain is limited and non-linear, suggesting the geometry is not strongly optimized for maintaining tire contact under compression.
- Toe behavior shows noticeable variation through travel, which can introduce instability or unpredictability, especially under combined loading.
- Wheel center path indicates a compromise between packaging and performance, rather than a tightly controlled kinematic target.
None of these are surprising in isolation — this is a cost- and packaging-driven platform — but the combination points to a system that prioritizes robustness and manufacturability over refined dynamic behavior.
The important takeaway is not the exact numbers, but the ability to rapidly move from physical hardware to a working model, and from that model to meaningful engineering questions.
What this project demonstrates
This is how I like to work: get curious, gather enough real-world data, build the tool that answers the next question, and use the result to make better engineering decisions. It is not about pretending the first model is perfect. It is about getting to a useful first answer quickly, then improving the model with every pass.